


There is a lot of article describing the reason to use python or the way to install the environment. I'll recommend you the following article, which is quite complete : auth0.com/blog/developing-restful-apis-with..
In this article, we will describe the way to create a small Python rest api and how to automatically create the documentation of the API with Swagger using flask RestPlus.
Create a Hello world
Let's start with an easy and simple example. Here is the first code to create a Rest API in Python :
import flask
from flask import Flask
app = flask.Flask(__name__)

@app.route("/hello")
def hello_world():
  return "Hello, World!"

if __name__ == '__main__':
    app.run(host="0.0.0.0", port=5000)
You can now, access your local address on the port 5000 : localhost:5000/hello, and see the "Hello world!" message.
Install and use Flask Restplus
To install and use flask_restplus in your project you have to import the library. By default, everything will be in the default namespace, if you want to create differents namespaces in the swagger ui, you can do it as described in this small code here (ns_cisel in this example).
from flask_restplus import Api, Namespace, Resource, fields
api = Api()
api.init_app(app,title='Cisel Rest API',
          description='Rest API for the CISEL project')
ns_default = api.default_namespace
ns_cisel = api.namespace('cisel-namespace', description='operations in the Cisel Namespace')
If you encounter problem with the library or errors with modules, try to add this import :
import werkzeug
werkzeug.cached_property = werkzeug.utils.cached_property
If you still have problem with modules in local, an error like this : Exception has occurred: ImportError cannot import name '_endpoint_from_view_func' from 'flask.helpers' You can use the monkey patching (found on this stackoverflow )
import flask.scaffold
flask.helpers._endpoint_from_view_func = flask.scaffold._endpoint_from_view_func
import flask_restful
Once it's done, you will find the Swagger UI available directly on the url localhost:5000
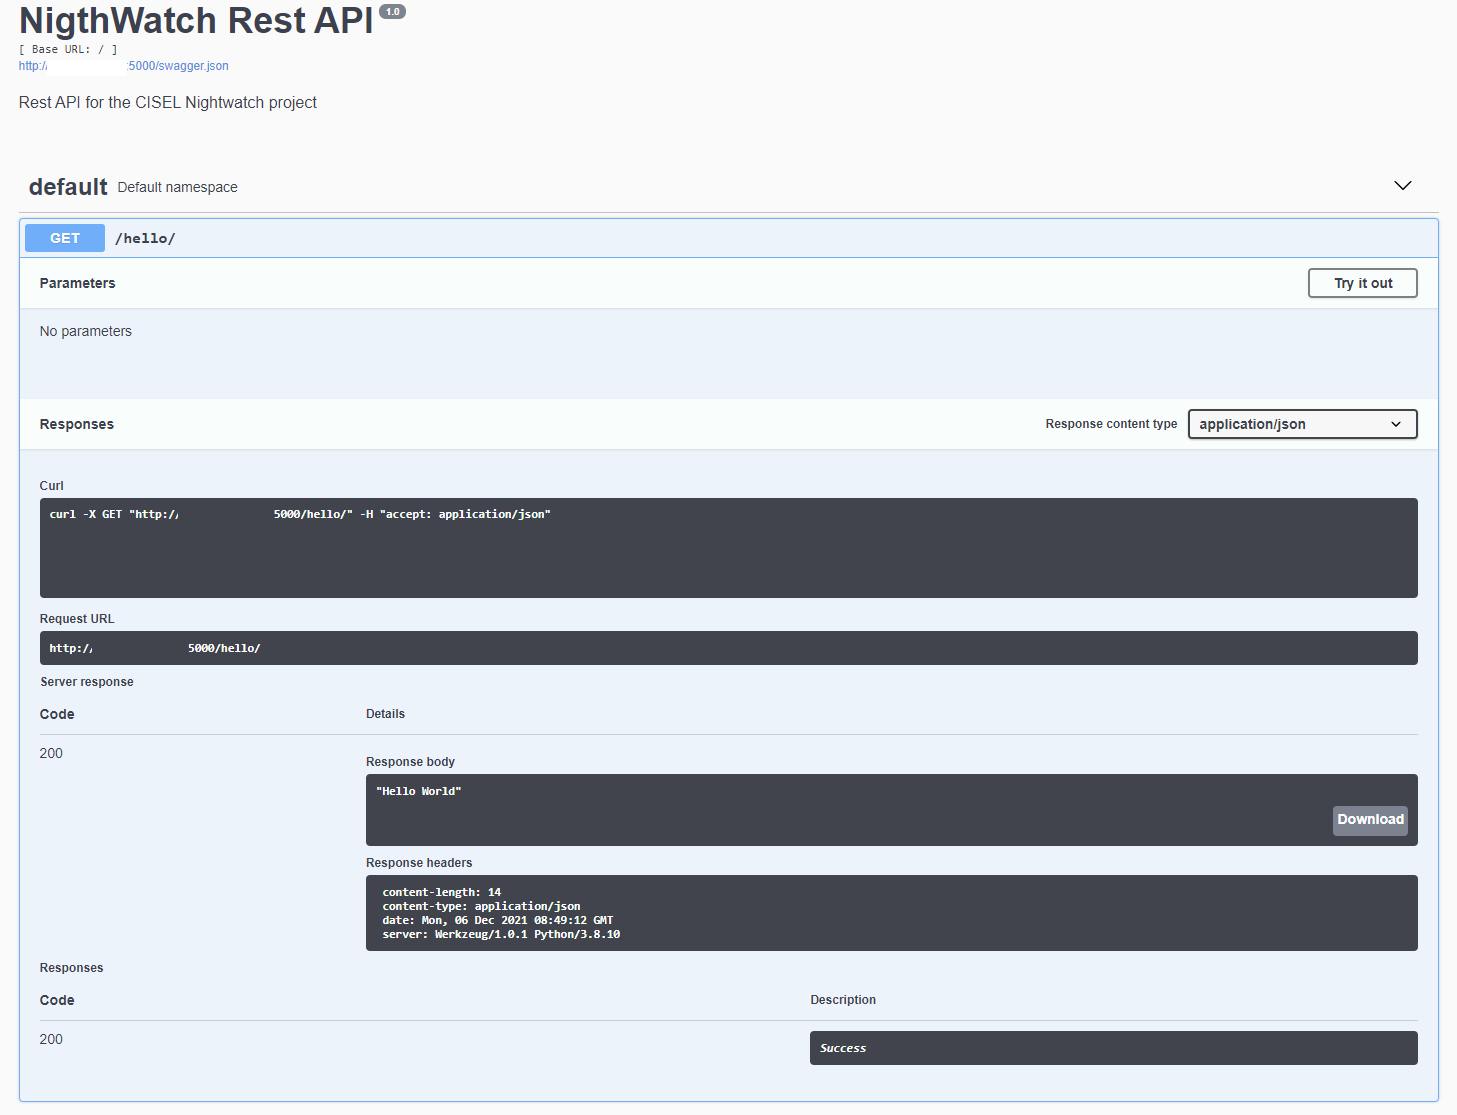
Documentation of a GET method
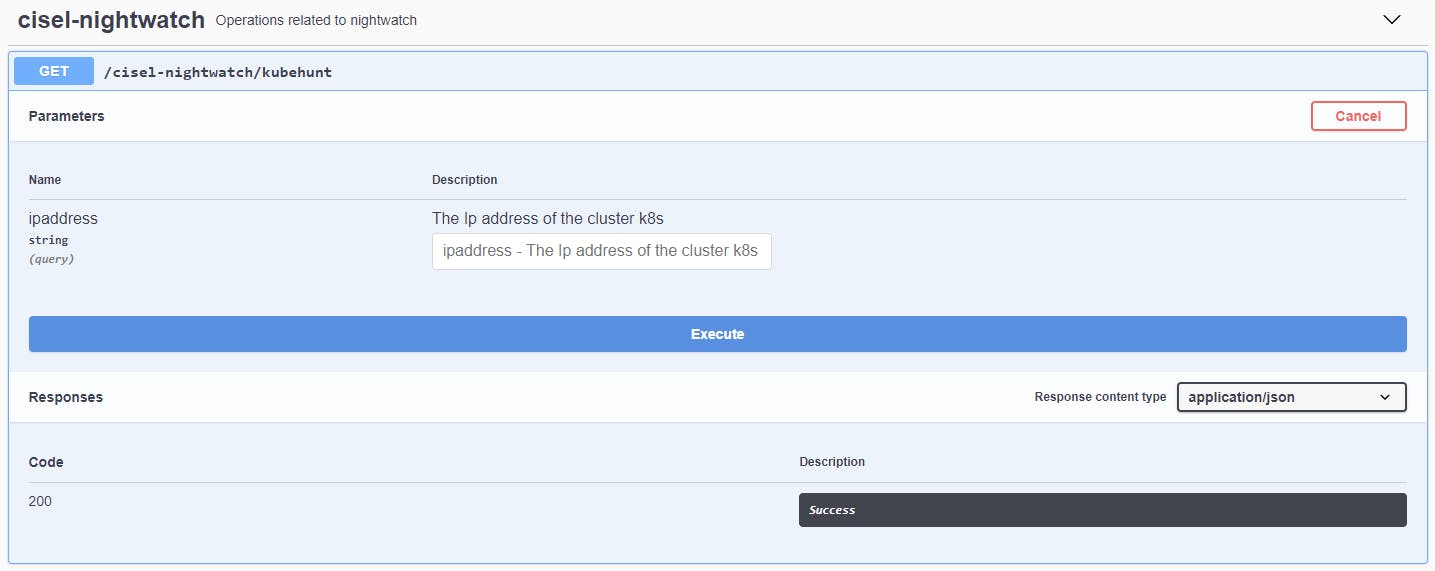
The api.doc() decorator allows you to include additional information in the documentation. You can document a class or a method. In this example, we will just add a parameter for a Get method with the .doc() decorator.
@ns_cisel.route('/kubehunt')
class KubeHunt(Resource):
    @ns_cisel.doc(params={'ipaddress': 'The Ip address of the cluster k8s'})
    def get(self):
        ipaddress = request.args.get('ipaddress')
        output = subprocess.check_output("kube-hunter --remote "+ipaddress+" --enable-cve-hunting --report json", shell=True)
        return output.decode("utf-8")
In this example, the parameter is the ip address of a kubernetes cluster and we can see it directly in the swagger documentation and even try it.
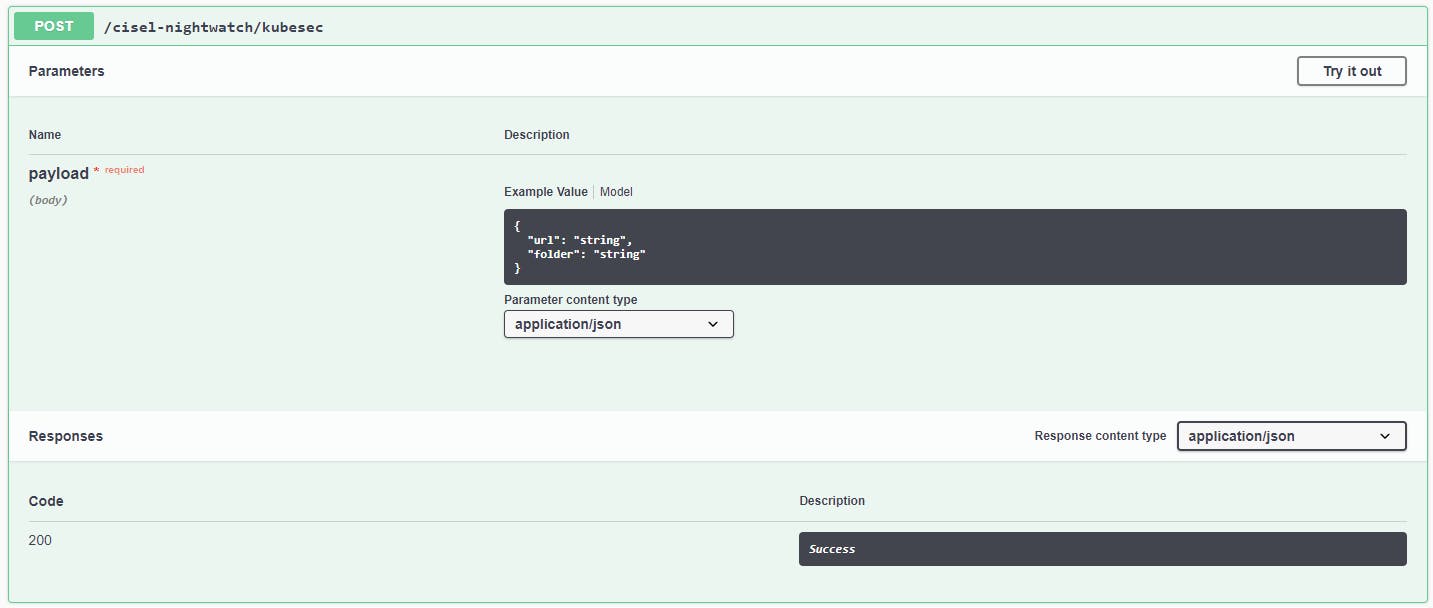
Documentation of a POST method
For this example, we will send a json body into the Post method. It's still in the .doc() operator, and you can use the parameter body to define the type of body that you expect. In order to render a nice swagger documentation, you can create a model which define the different fields of your json body.
kubesecFields = ns_cisel.model('kubesec model', {
    'url': fields.String(description='URL Git repo', required=True),
    'folder': fields.String(description='Folder in the repo', required=True)
})

@ns_cisel.route('/kubesec')
class KubeSec(Resource):
    @ns_cisel.doc(body=kubesecFields)
    def post(self):
        content = request.json
        urlGit = content['url']
        folder = content['folder']
        output = subprocess.check_output('git clone '+urlGit+'; cd '+folder+'; find . -type f -name "*.yaml" -exec kubesec scan {} \;', shell=True)
        return output.decode("utf-8")
In this example, the tool kubesec needs an URL and a folder string. We can see in the swager documentation that the post method require a json content in the body and even try it directly.
Enjoy!!
Feel free to comment this article if you have questions.