


ArgoCD is a must try GitOps continuous delivery tool for Kubernetes.
In this story we will show you how to deploy ArgoCD on Kubernetes and then deploy your first application using it.
Installing ArgoCD on your Kubernetes cluster is as simple as this:
kubectl create namespace argocd
kubectl apply -n argocd -f https://raw.githubusercontent.com/argoproj/argo-cd/stable/manifests/install.yaml
If your Kubernetes cluster is running on a public cloud or using a loadbalancer service (like MetalLB) you will want to configure ArgoCD service as type LoadBalancer with the following command.
kubectl patch svc argocd-server -n argocd -p '{"spec": {"type": "LoadBalancer"}}'
If you are not using a loadbalancing service you can configure an ingress rule like the one bellow. The annotation ssl-passthrough is mandatory because Argo CD serves multiple protocols (gRPC/HTTPS) on the same port (443).
apiVersion: extensions/v1beta1
kind: Ingress
metadata:
  name: argocd-server-ingress
  namespace: argocd
  annotations:
    kubernetes.io/ingress.class: nginx
    nginx.ingress.kubernetes.io/force-ssl-redirect: "true"
    nginx.ingress.kubernetes.io/ssl-passthrough: "true"
spec:
  rules:
  - host: argocd.example.com
    http:
      paths:
      - backend:
          serviceName: argocd-server
          servicePort: https
The initial ArgoCD default admin password is the name of the argocd-server pod. You can retrieve it with the command
kubectl get pods -n argocd -l app.kubernetes.io/name=argocd-server -o name | cut -d'/' -f 2
To change the admin password you will need to use the argocd CLI. You can find the installation information here : https://argoproj.github.io/argo-cd/cli_installation/
Update the admin password with the two argocd CLI commands below
argocd login <ARGOCD_SERVER_IP_OR_URL>
argocd account update-password
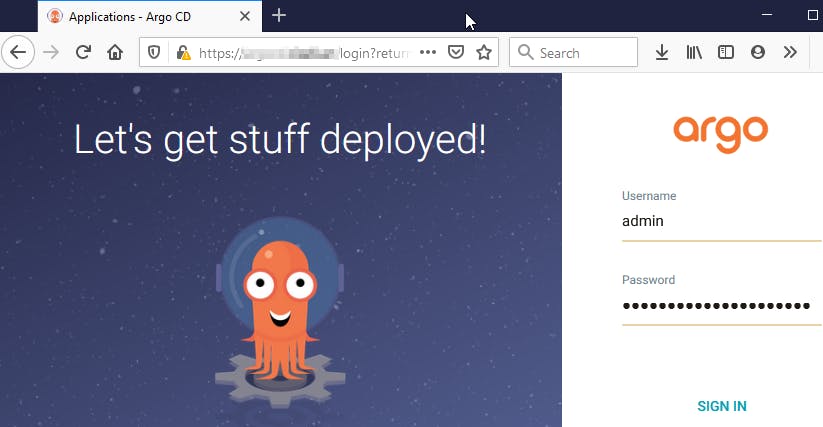
Access the ArgoCD URL using https and login with the admin username and the new admin password.
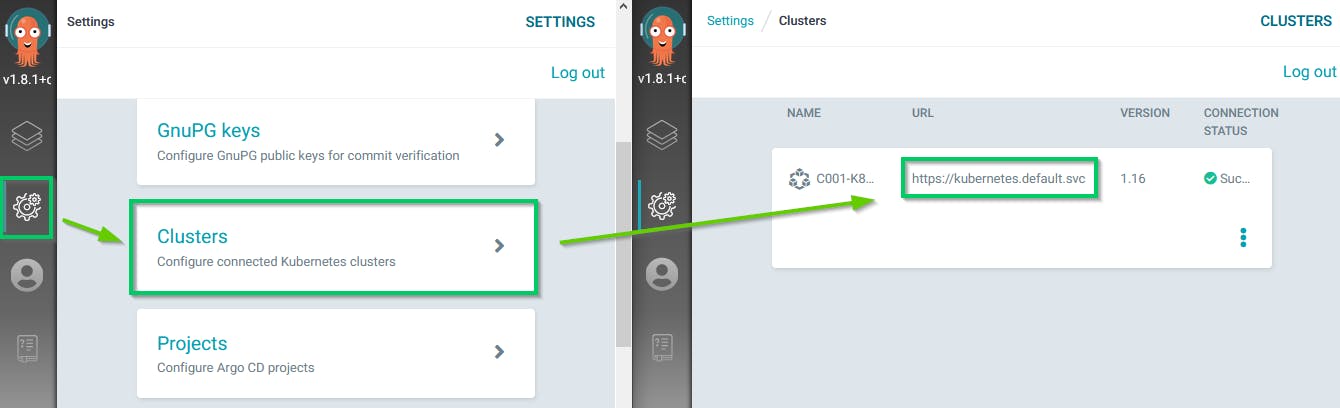
The first step is to register the Kubernetes cluster on which one you will want to deploy your application. You can register multiple Kubernetes clusters in one ArgoCD instance. By default the local cluster on which you deployed ArgoCD is registered.
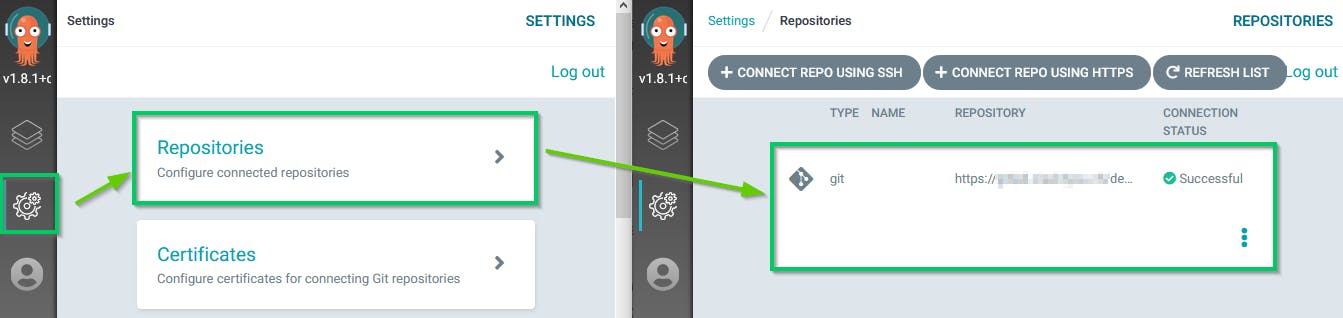
ArgoCD is a GitOps tool so the next step is to give it access to your Git repository that hosts your project.
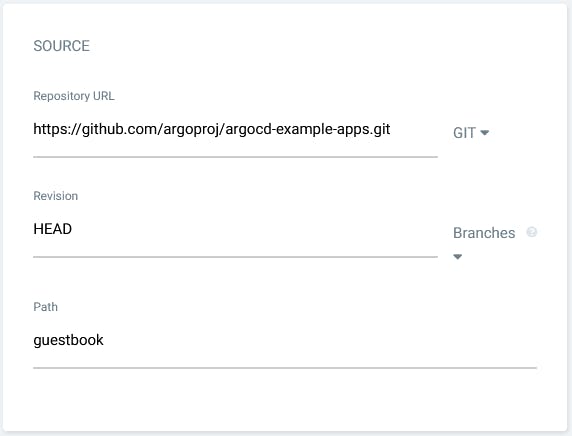
Then we will deploy an application, using the GitOps methodology. In this example we will use a public repository that hosts a demo application. https://github.com/argoproj/argocd-example-apps/tree/master/guestbook
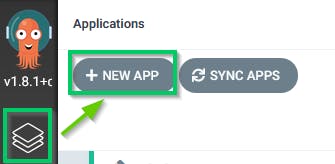
Create a new App
In the General section we will give a custom application name and use the default project that allows us to deploy from any git repository to any Kubernetes cluster. The sync policy is set to Manual by default. This means that you will need to manually click on the Sync button if you want to apply the commits from Git to the Application.

In the source section you need to specify the source Git repository URL, with the .git suffix, and then the path that contains the application that we want to deploy.
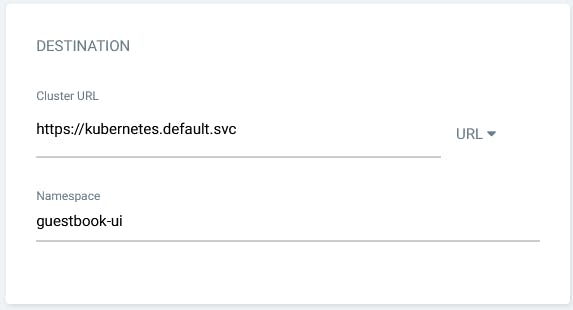
Finally we tell to ArgoCD where we want to deploy this application. We will let the Directory section with the default values.
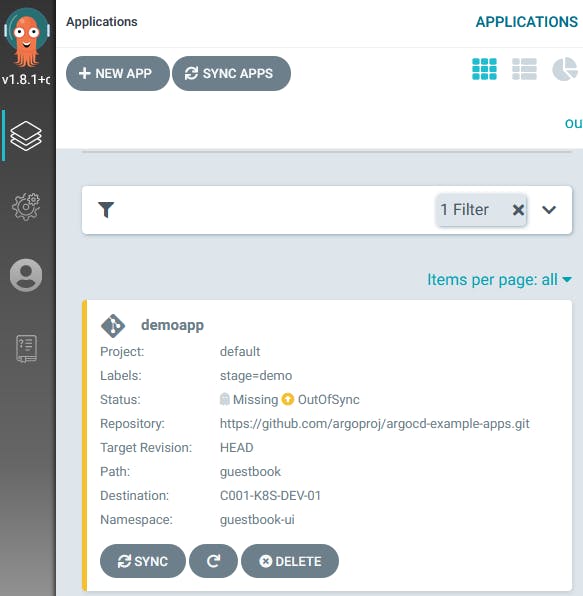
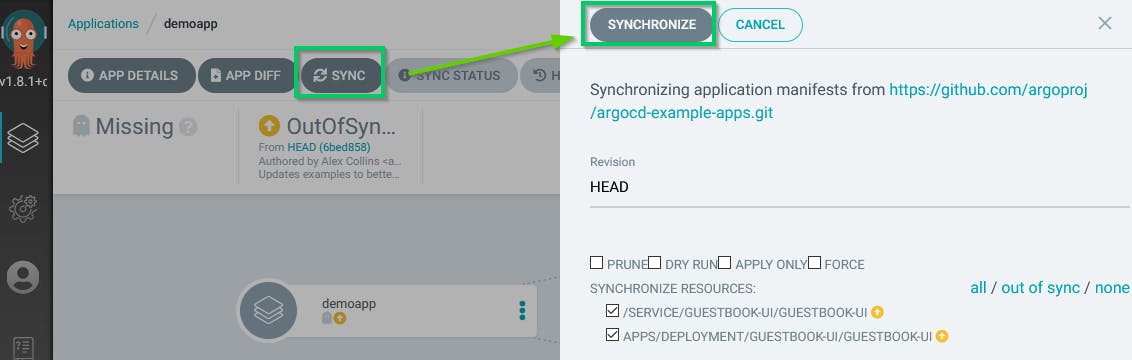
Now you can see that the application has the status Missing and OutOfSync because we have configured a Manual sync policy.
Click on the application to display the details and SYNC it to deploy the application to the cluster.
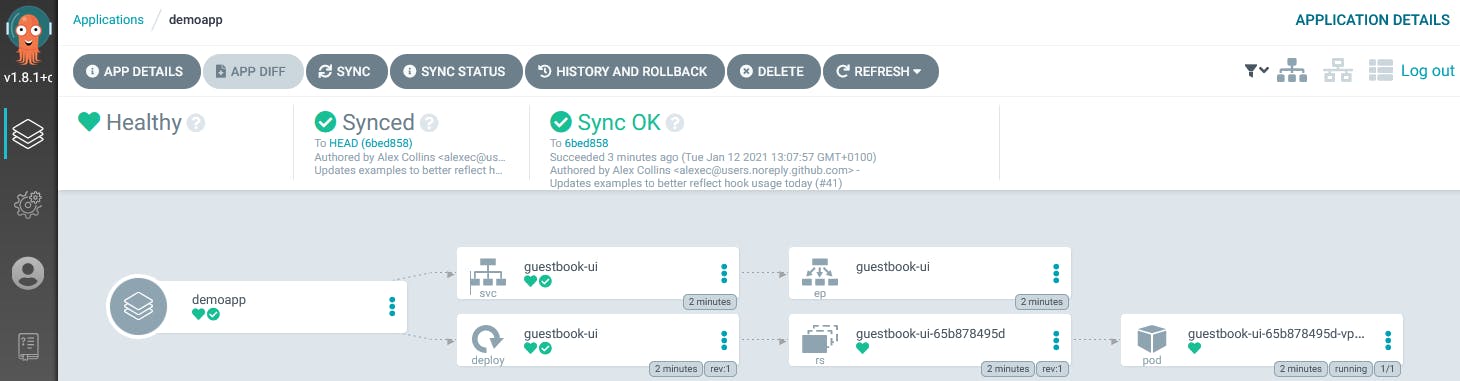
Your application is now SYNCED between the Git repository and your Kubernetes cluster.
If you use a Git repository that you own as the source, try now to change some code in it and check the sync status in ArgoCD. Try also to enable the AUTO-SYNC policy in your application to let ArgoCD automatically apply new commits to your deployment on Kubernetes.
Et voilà! You are ready to go with GitOps
Enjoy!!
Feel free to comment this article if you have some question.
References