

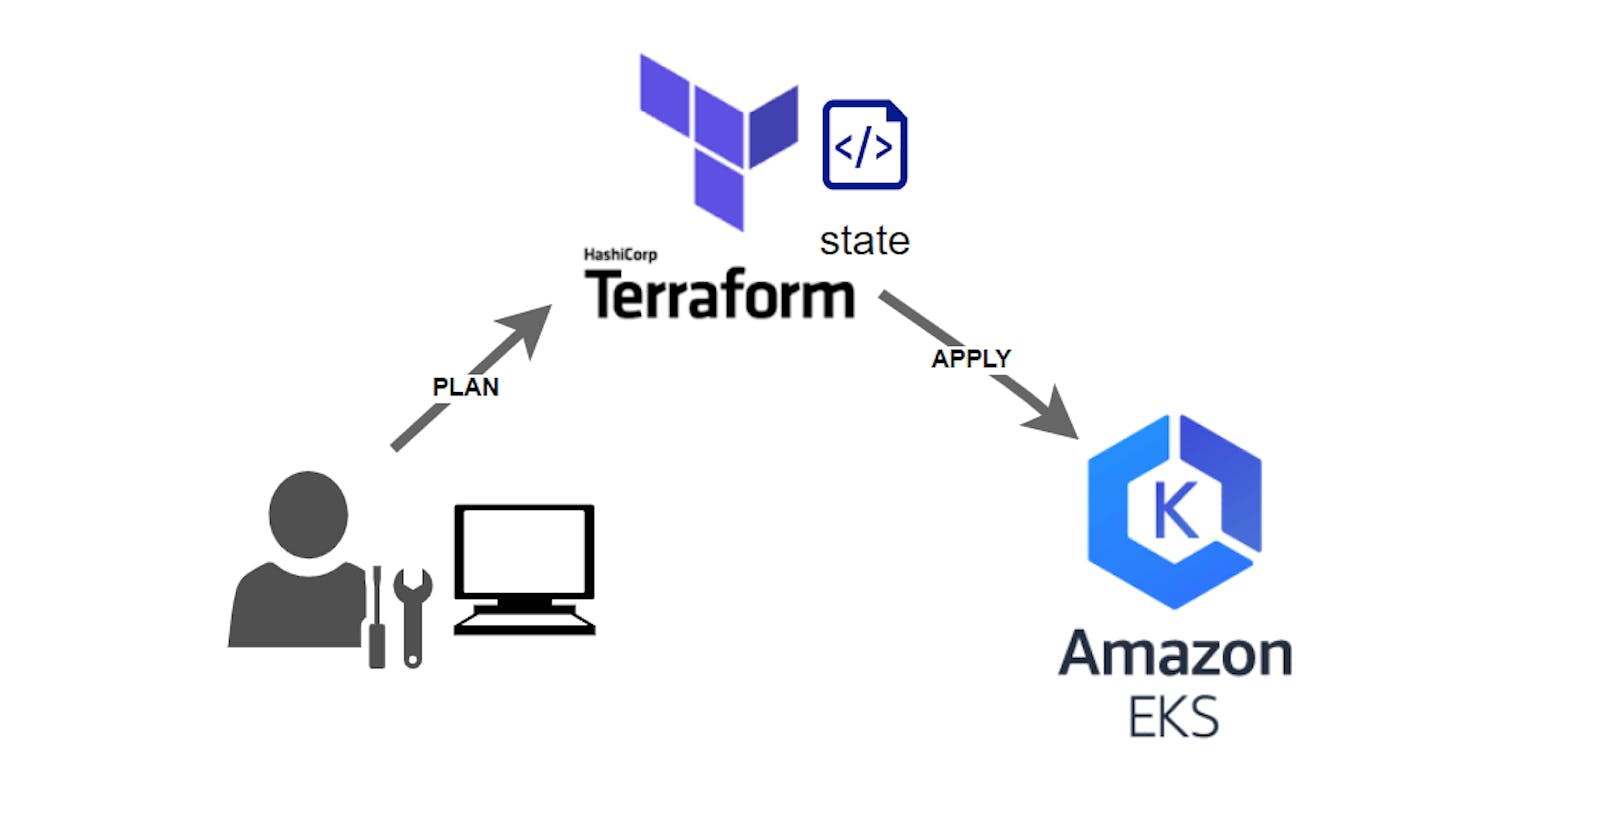


In this page we will show you how to use Remote state with Terraform Workspace. All this through a fully automated Kubernetes cluster deployment on AWS EKS !!!
Why do we want to use a Remote state provider like Terraform Workspace?
In the default configuration, Terraform stores the state in a file in the current working directory where Terraform was run. This is okay for getting started, but when using Terraform in a team it is important for everyone to be working with the same state so that operations will be applied to the same remote objects.
Remote state is the recommended solution to this problem. With a fully-featured state backend like Terraform Workspace, Terraform can use remote locking as a measure to avoid two or more different users accidentally running Terraform at the same time, and thus ensure that each Terraform run begins with the most recent updated state.
Here is the summary of what we are going to do:
Prepare your AWS IAM account and policies for EKS deployment
Prepare your Terraform Cloud Workplace for remote state
Create your EKS cluster with remote state
Access your EKS cluster
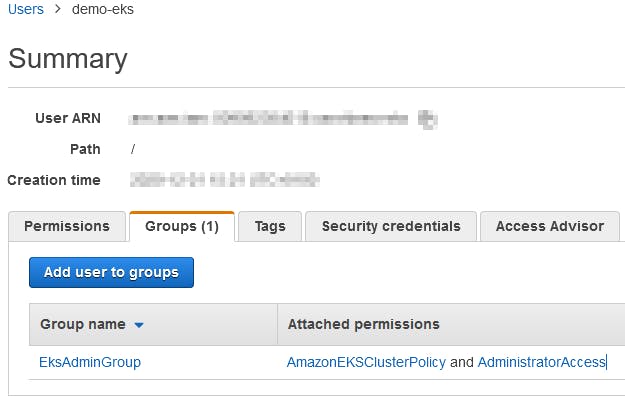
First we will create a new IAM user demo-eks with Programmatic access and the rights to use all the stuff needed to create an EKS cluster in a brand new VPC.
It is not easy to find out which rights and policy is needed and it depends on you environment. These right below will always work. You will probably need to limit these rights, particularly with regard to administrative rights.
We create a new EksAdminGroup group with these two AWS Managed policy AmazonEKSClusterPolicy and AdministratorAccess.
Then we add the demo-eks user to this new EksAdminGroup group.
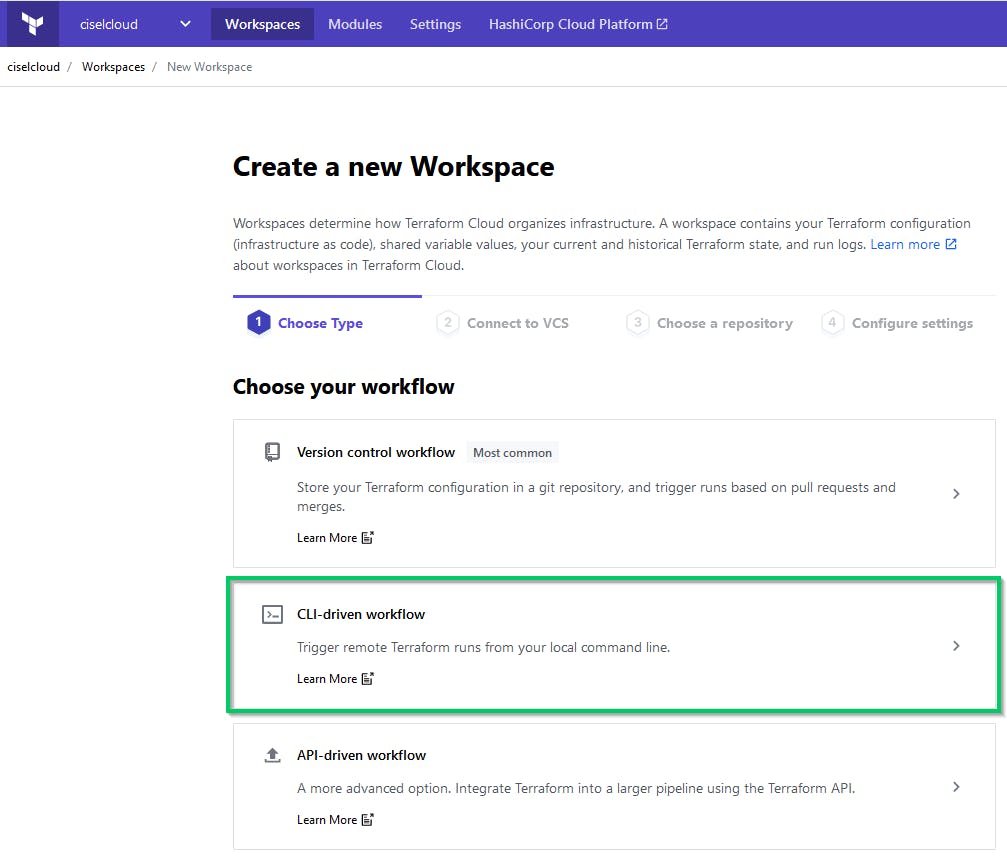
Next step will be to setup the Workspace in Terraform Cloud.
Create an account on app.terraform.io
Create a new Workspace and specify a CLI-driven Workflow
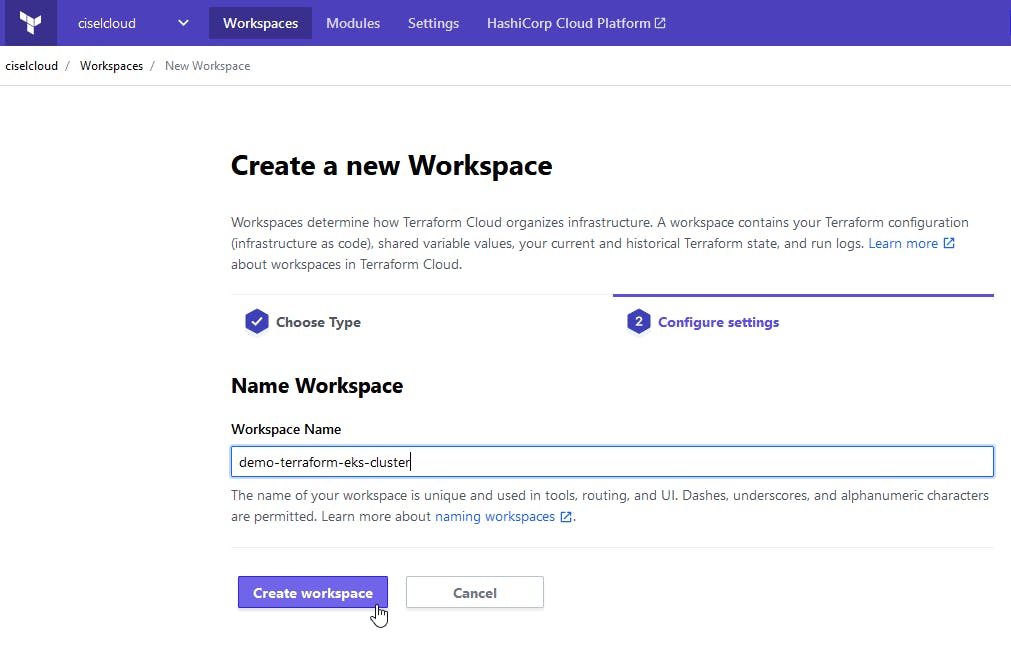
Set a name and that's it
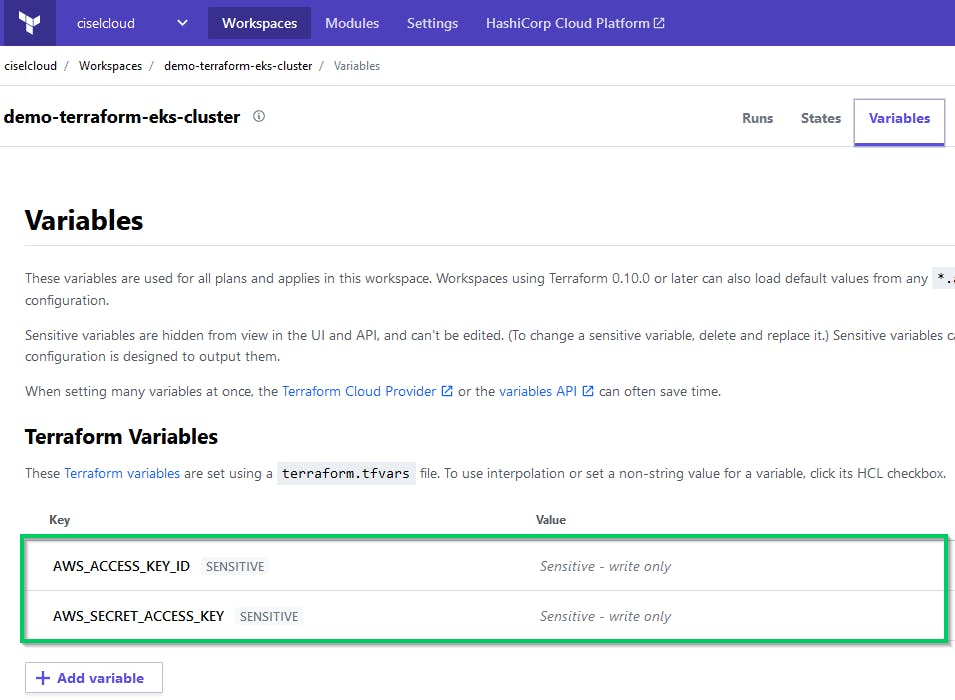
Now we have to create Terraform variables that will be used to connect to AWS in order to create the cluster and all the resources needed.
Use the values of the AWS_ACCESS_KEY_ID and the AWS_SECRET_ACCESS_KEY for the demo-eks user and put them in variables of your Workplace. Set these variables as sensitive. Terraform Cloud creates an ephemeral VM to run Terraform operations (which create and manage your infrastructure).
Create a new API Token that you will use on your Workstation when you will interact with Terraform with terraform login app.terraform.io/app/settings/tokens
You will need to clone this repo to your workstation : github.com/cisel-dev/eks-terraform-demo.git
git clone https://github.com/cisel-dev/eks-terraform-demo.git
It's time to adapt some values to be able to run this project.
demo-eks-backend.tf : Fill with your Terraform values
terraform {
  backend "remote" {
    organization = "your-terraform-organisation"

    workspaces {
      name = "your-terraform-workplace"
    }
  }
}
demo-eks-vpc.tf : Change the AWS Region if needed
...
variable "region" {
  default     = "eu-west-3"
  description = "AWS region"
}

provider "aws" {
  version = ">= 2.28.1"
  region  = "eu-west-3"
}
...
Okay, let's deploy an EKS cluster using Terraform!
Go to your project folder and run terraform login Then write yes in the prompt and give the API token that we just created.
![2020-12-22 14_32_44-demo-eks-kubernetes.tf - demo-terraform-eks-cluster [WSL_ Ubuntu-18.04] - Visual.png](https://cdn.hashnode.com/res/hashnode/image/upload/v1608644019884/IsgVZwIrF.png?auto=compress,format&format=webp)
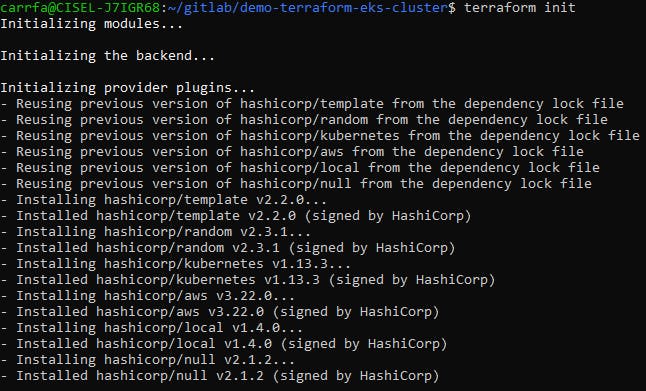
Then initialize terraform with the command terraform init
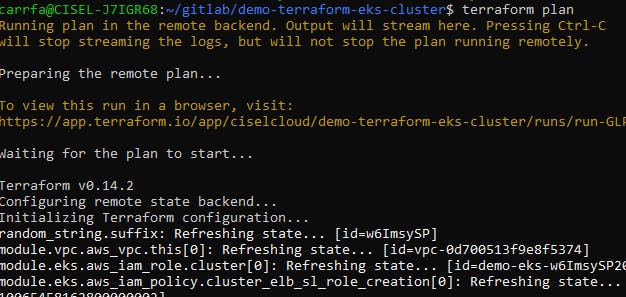
Execute terraform plan and review what will be created
Finally terraform apply to deploy the infrastructure
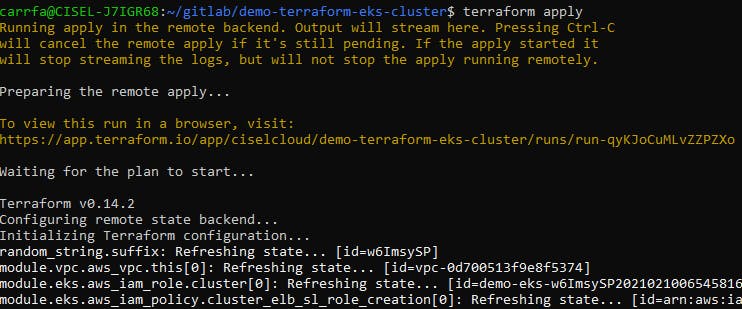
Again, answer yes when asked in the prompt.
You can see the status of the RUN in the console of the Workstations but also in the Terraform Cloud web UI. That means that from now every member of your team is aware that your are planing, creating or deleting a specific deployment !!!
The status will be RUNNING when terraform is still creating the deployment
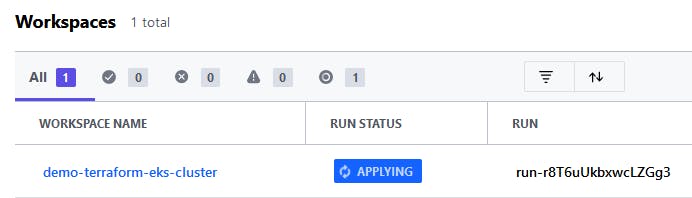
And APPLIED when it's successful

The deployment can take a few minutes. Pressing Ctrl-C will cancel the "apply" process if it's still pending.
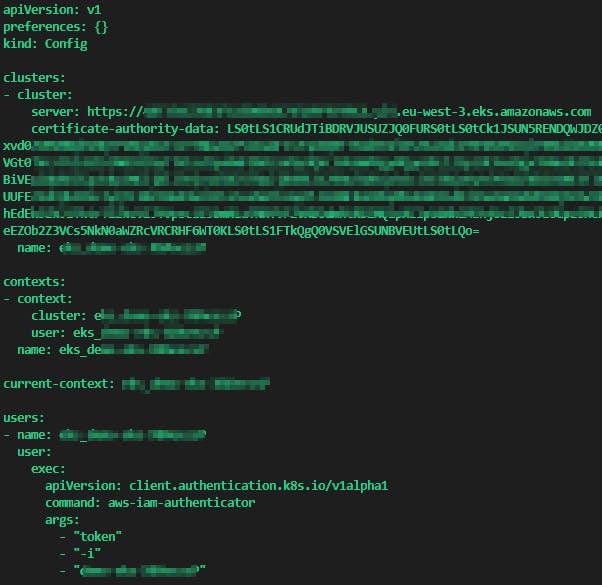
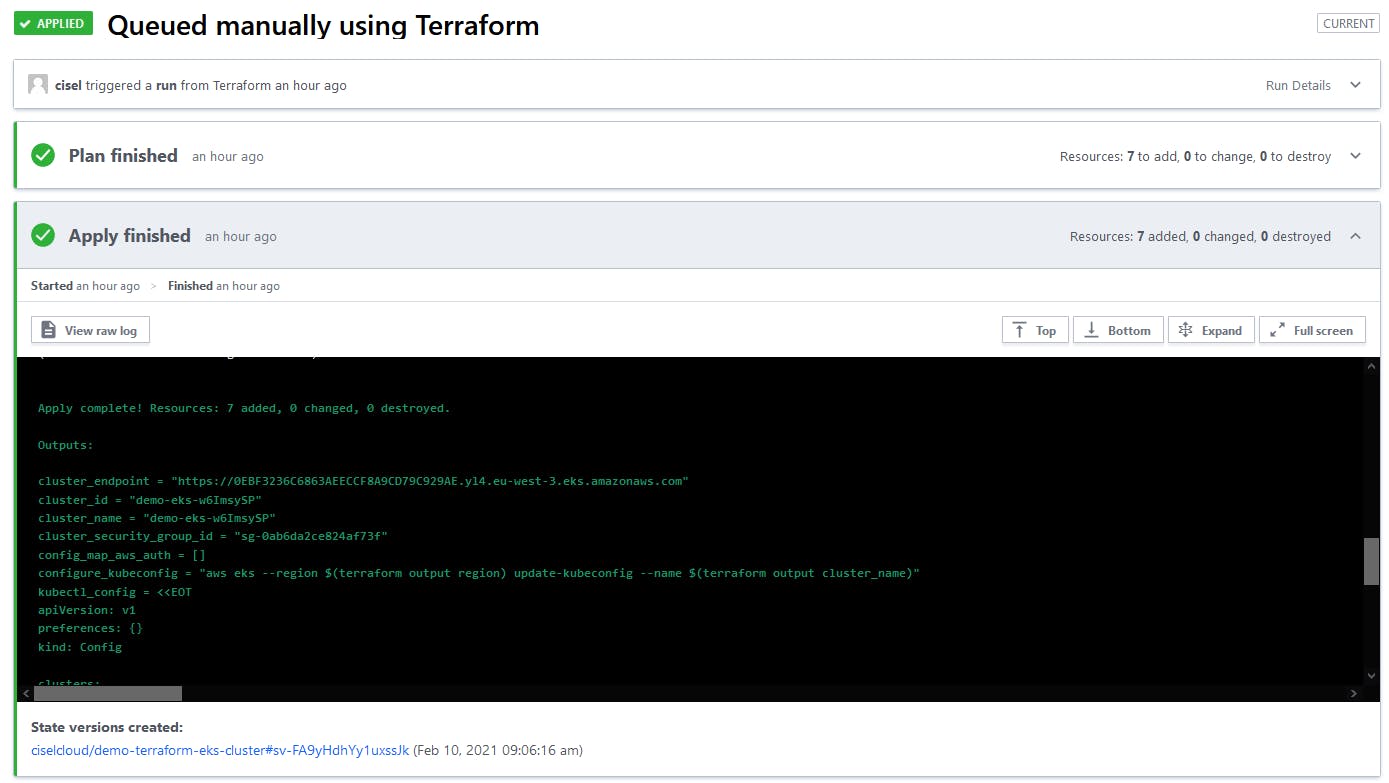
The final Terraform output of the plan will give you precious information about your newly created EKS cluster.
It contains the kubeconfig content, so you will need to create a kubeconfig file with this output and the run export KUBECONFIG=kubeconfig
If you close the console and did not save the output of Terraform, you can still find the output of a specific run in the Terraform Cloud web UI
We need the aws-iam-authenticator tool to interact with AWS, follow the installation link below docs.aws.amazon.com/eks/latest/userguide/in..
Here are the command to configure your access to EKS. Give the access key ID and secret of demo-eks
aws configure
aws eks --region $(terraform output region) update-kubeconfig --name $(terraform output cluster_name)
Check your cluster status
kubectl cluster-info
kubectl get nodes -o wide
kubectl get all -A
When you do not need your cluster any more you can destroy it with terraform destroy.
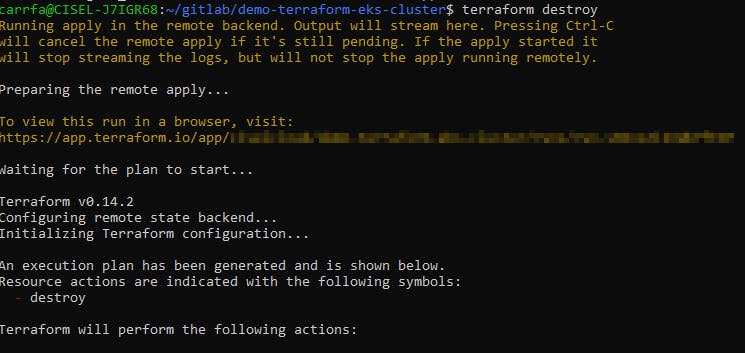
You can see the status **Deleting ** of your cluster in the AWS console. After a few minutes your cluster and all the resources are deleted from AWS.

Ooooops you forgot to show some funny stuff on Kubernetes to your colleagues this afternoon? Dont't worry, create again your EKS Cluster in AWS.
terraform login
terraform init
terraform plan
terraform apply
Feel free to comment this article if you have some question.