If you are looking to store your Docker containers online in a secure way, take a try with Amazon ECR (Elastic Container Registry)
It is not a complicated process but there are a few pitfalls to avoid. In this post you will find a simple but functional example to publish your Docker containers from Gitlab to AWS ECR.
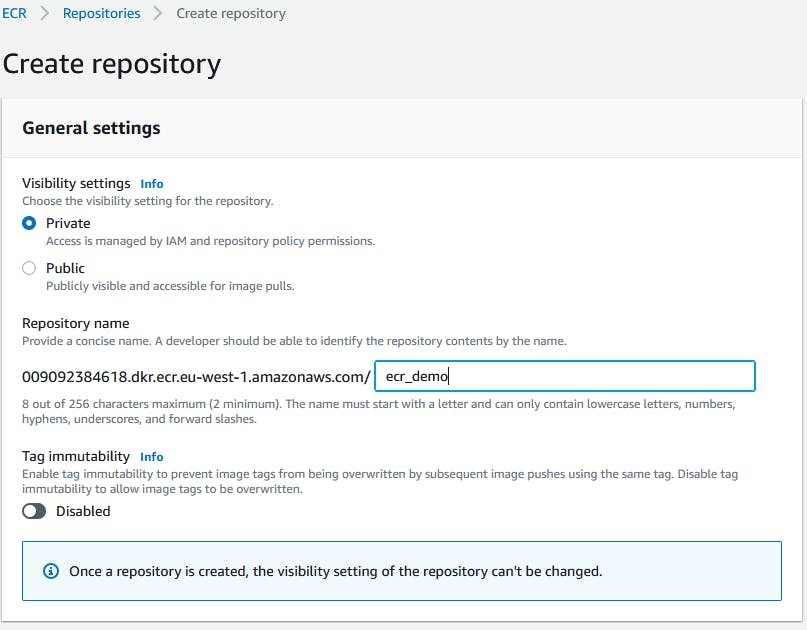
The first step is to create an ECR repository. To do this go to the ECR service panel in AWS management console and create a repository.

Set it to private and let the settings by default
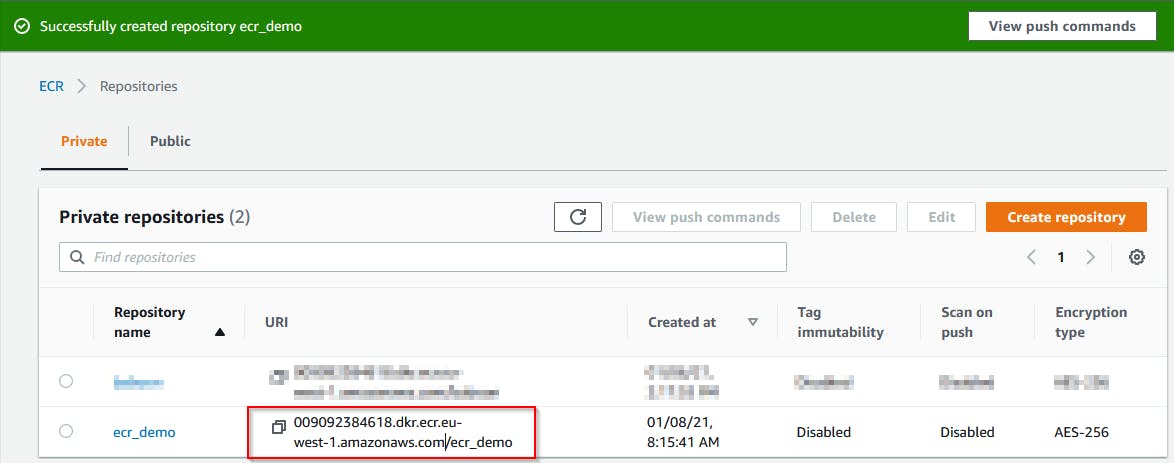
Copy the repository URI for later usage
The next step is to create an IAM account in AWS and give him the rights to access the Amazon container registry in your tenant
Go to the IAM dashboard using the Amazon web management console, then add a new user
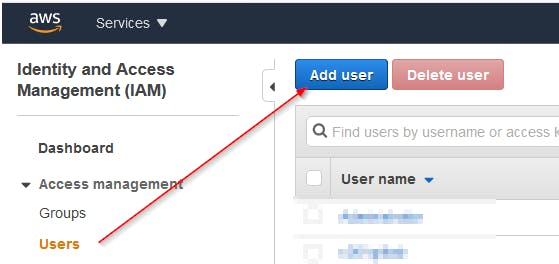
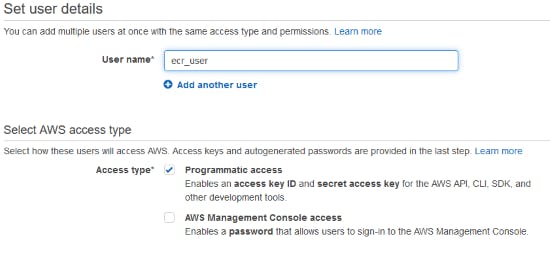
Give him a meaningful username and Programmatic access
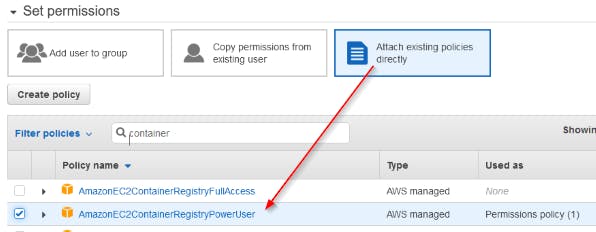
To read, write and modify containers in ECR we need to give the existing policy AmazonEC2ContainerRegistryPowerUser to the account
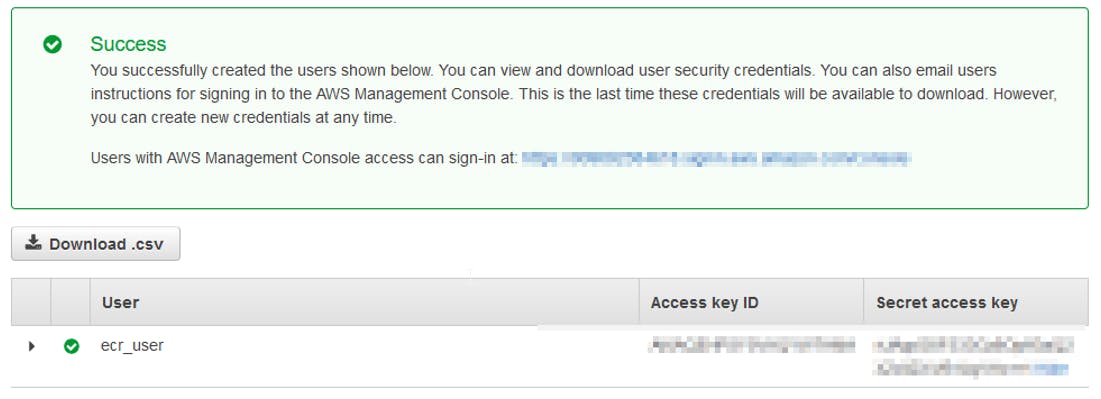
After the creation of the user account you will receive an Access Key ID and a Secret Access Key. Copy both in a safe place. You will need them later.
The AWS setup is done, now we can go to our Gitlab project and create the Variables and the files that will allow us to build the container and push it to ECR.
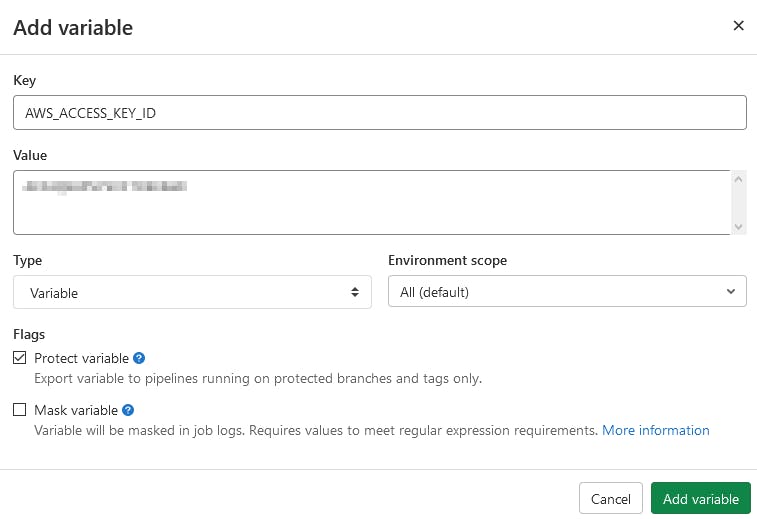
We create 2 projects variables to allow Docker to login to AWS without passing the IAM credentials in the CI code. You will create the AWS_ACCESS_KEY_ID and AWS_SECRET_ACCESS_KEY with the values that we get previously. These are normalized variables that Gitlab will use when AWS access request will be asked in the project. Just follow the steps below
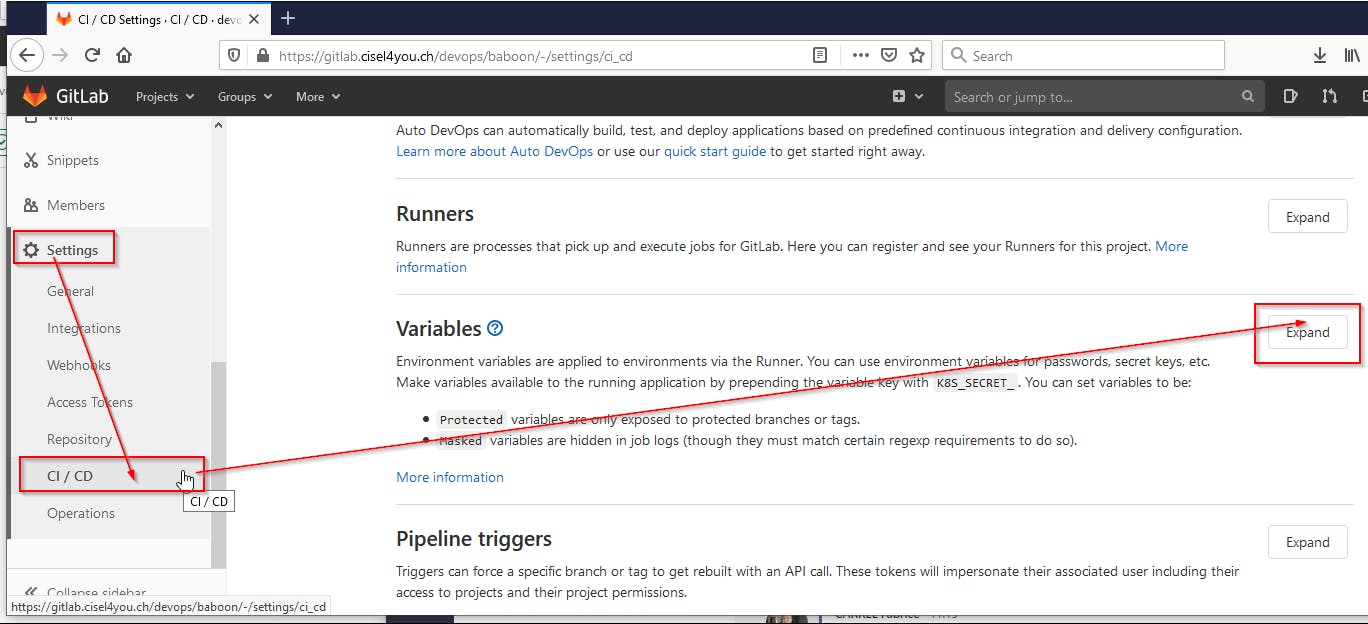
Create the AWS_ACCESS_KEY_ID
Create the AWS_SECRET_ACCESS_KEY
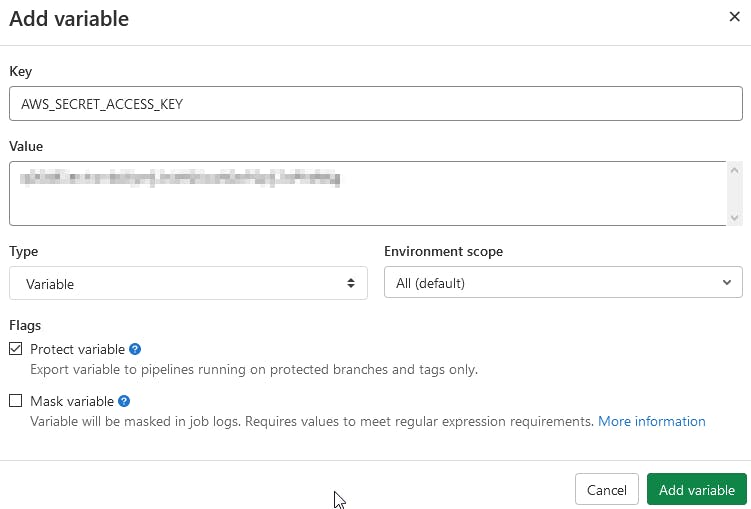
Both Variables are now ready to be used in the project

In the repo we have the gitlab-ci.yml, the Dockerfile and a folder with the demo web application.
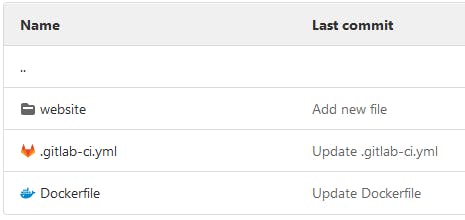
In the Dockerfile we just copy the content of our website folder into the nginx web service.
FROM nginx:alpine
COPY ./website /usr/share/nginx/html
In the website folder we have a index.html file with this content
Gitlab to ECR demo
Create the .gitlab-ci.yml file in your repository with the content below. You will have to set your own
- DOCKER_REGISTRY : the repository URI without /ecr_demo
- AWS_DEFAULT_REGION : you can find it in the DOCKER_REGISTRY i.e eu-west-1
- APP_NAME: name of your ECR repository i.e ecr_demo
# Simple example of CI to build a Docker container and push it to Amazon ECR
variables:
  DOCKER_REGISTRY: 000000000000.dkr.ecr.eu-west-1.amazonaws.com
  AWS_DEFAULT_REGION: eu-west-1
  APP_NAME: ecr_demo
  DOCKER_HOST: tcp://docker:2375
  DOCKER_DRIVER: overlay2
  DOCKER_TLS_CERTDIR: ""

publish:
  stage: build
  image:
    name: docker:latest
  services:
    - docker:19-dind
  before_script:
    - apk add --no-cache curl jq python3 py3-pip
    - pip install awscli
    - aws ecr get-login-password | docker login --username AWS --password-stdin $DOCKER_REGISTRY
    - aws --version
    - docker info
    - docker --version
  script:
    - docker build -t $DOCKER_REGISTRY/$APP_NAME:$CI_PIPELINE_IID .
    - docker push $DOCKER_REGISTRY/$APP_NAME:$CI_PIPELINE_IID
Let's have a deeper look at this gitlab-ci.yml
DOCKER_HOST: This will allow us to use the service docker:19-dindDOCKER_DRIVERandDOCKER_TLS_CERTDIR: They help us to correct some issues, you can find the related links at the end of the post.docker:19-dind: Means that we use Docker in Docker to log in AWS in the before_script part.
In the before_script section we install awscli in docker:19-dind and create a login session to our AWS ECR. The credentials used will come from the project variables.
apk add --no-cache curl jq python3 py3-pipandpip install awscli: Will install the prerequisites for awscli and awscli itselfaws ecr get-login-password | docker login --username AWS --password-stdin $DOCKER_REGISTRY: Will create an authenticated session to the ECR registryaws --version,docker infoanddocker --version: Print some informations
And finally the script section will build the Docker container with the pipeline ID as tag and push it to the ECR
  script:
    - docker build -t $DOCKER_REGISTRY/$APP_NAME:$CI_PIPELINE_IID .
    - docker push $DOCKER_REGISTRY/$APP_NAME:$CI_PIPELINE_IID
If everything goes well in the CI/CD job output you will find your newly created image in the ECR repository.
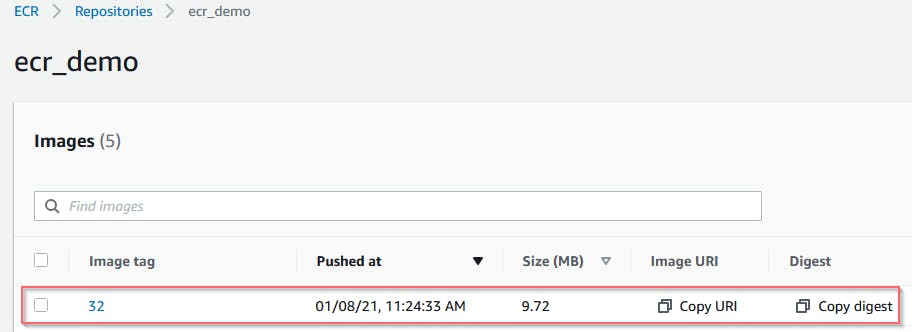
Enjoy!!
Feel free to comment this article if you have questions.
References
https://www.youtube.com/watch?v=jg9sUceyGaQ
https://docs.gitlab.com/ee/ci/docker/using_docker_build.html#kubernetes
https://gitlab.com/gitlab-org/gitlab-foss/-/issues/64959#note_194620798
https://dev.to/gustavorglima/how-to-solve-error-unsatisfiable-constraints-python-48k7

